You can complete ergonomics studies within the Activity Editor through the observed and calculated time tabs. Within each time tab, there is a separate tab attached to the bottom of the sheet called ergonomics. Two types of Ergonomic analyses can be attached to Assembly Planner: Standard and Empowered. Depending on your system preferences, you may have the Standard or Empowered MURI analysis or neither. For a description of the differences, see the Standard vs Empowered section of this manual.
When the ergonomics tab is selected within the observed time study mode, the elements of the activity (ID, Description, Frequency, Time, RTT) previously entered in the observed time tab automatically populate to the ergonomics tab. If the data needs to be changed, changes need to take place under the Tasks tab within the table. See the Time Estimation section for information on completing a time study.
Ergonomics Motions Tab
When the Ergonomics Motions Tab is selected within the calculated time study mode, the elements of the activity (ID, Description, Operator Instruction, Code/Time, Frequency,Time, and RTT) previously entered in the calculated time tab automatically populate to the Ergonomics Motions Tab. You will not be able to edit this data within the Ergonomics Motions Tab. If the data needs to be changed, changes need to take place under the Code Lookup tab within the table.
To complete a more precise ergonomics analysis, the video imported within the observed time study can be viewed in the calculated time study (the video is automatically imported to the calculated time study from the observed time study). In Calculated Time, clicking on the StartTime or EndTime for a given task while the video is playing allows the time to be shown and associated with the task. By doing so, the video loaded for the activity will show up under the Video column.
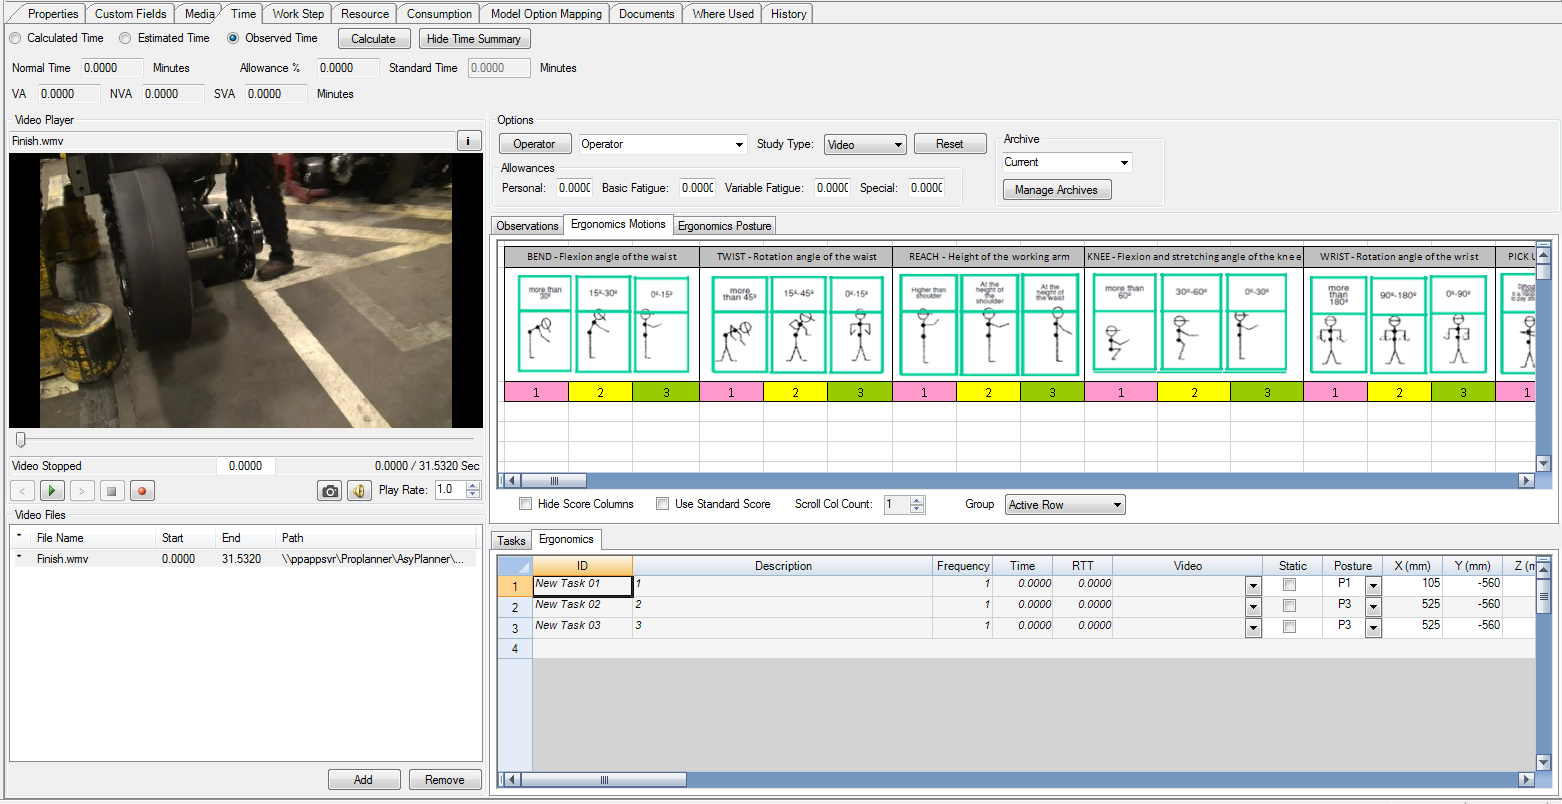
Objects' weights, applied force, and the activity's steps can be added within the sheet along with any notes. Ratings can be assigned to each category for performing the ergonomic analysis for each activity. The colors specify varying levels of severity: red is high severity and green is low severity. A legend for the ratings is shown in the ergonomics motions tab above the editing sheet. For a full description on the functionality of the Ergonomics Motions Tab, see the Ergonomics Time Study section of this manual.
If the Options tab is not available within the Activity Editor as it is in the Operation Editor. However, the check box for using only the standard score is available for use if only the standard nine metrics need to be used rather than all seventeen. There is also the option to check the box to hide the score columns within the Ergonomics.
You can also change the weight of each category. To do so, first go to Tools > Options and click on the Ergonomics Tab. Enter the desired weights for each level and category.

Ergonomics Tab Showing Scoring
Checking the Group Edit box allows for changes in the value for the activity's actions. Once this box is check, clicking on the number below the picture that resembles the action will automatically change the value in the table below. You can also click on the boxes within the given action to manually change the value given if that is more convenient. Scrolling all the way to the right will show the actions score of all the actions added up.
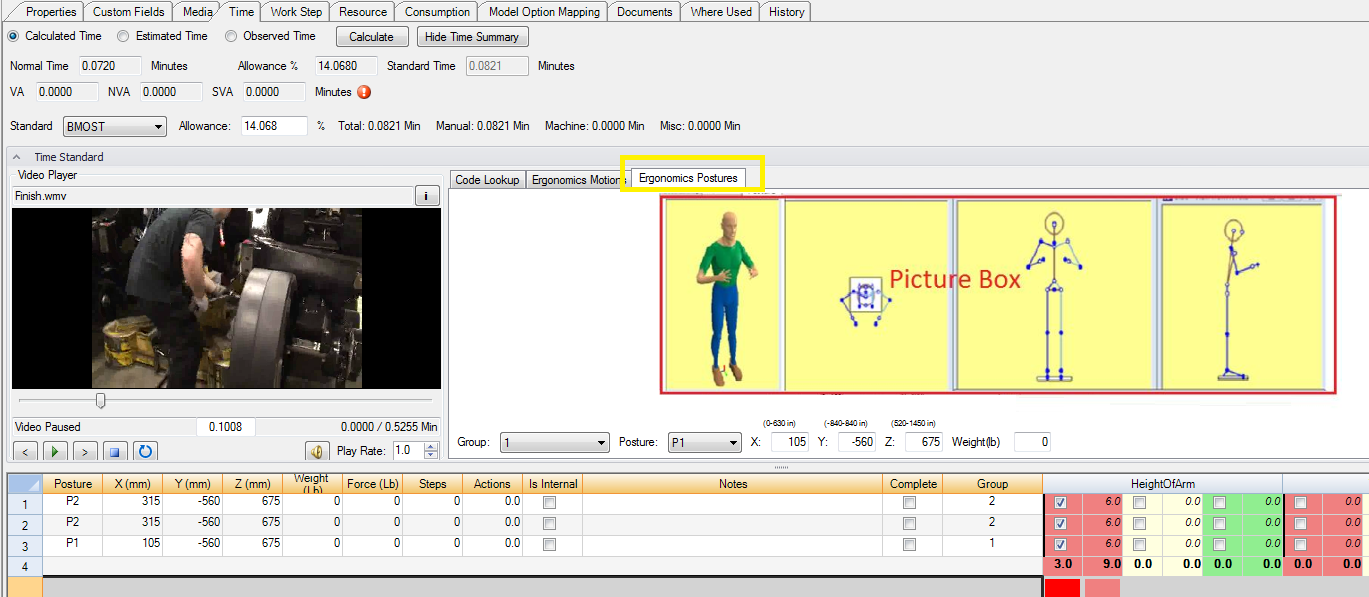
Ergonomics Postures Tab
The Ergonomics Postures Tab allows users to more easily specify values for posture-related EMMURI categories by selecting a single postural value from a list of possible values. This allows users to perform a predictive EMMURI analysis based on what is known about a working area, rather than an observed EMMURI analysis of a worker already performing the work. This allows for a better layout of working areas and a better association of work during the design of a line or a new product launch.
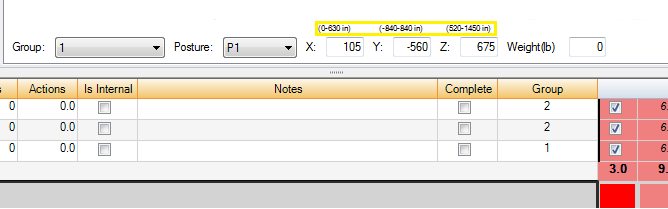
Ergonomic Postures can be assigned either by selecting a task(s) or selecting a group, then selecting a posture from the posture drop down list. Groups can be created in the group column for tasks.
Each Posture has a predetermined X, Y, and Z value, which can also be manually changed for tasks or groups.
This X, Y, Z and weight value is then translated to a set of scores for postural ergonomics categories:
oFlexion angle of the waist
oFlexion angle of the knee
oTrunk axial rotation angle
oRotation Angle of the Waist
oRotation Angle of the Wrist
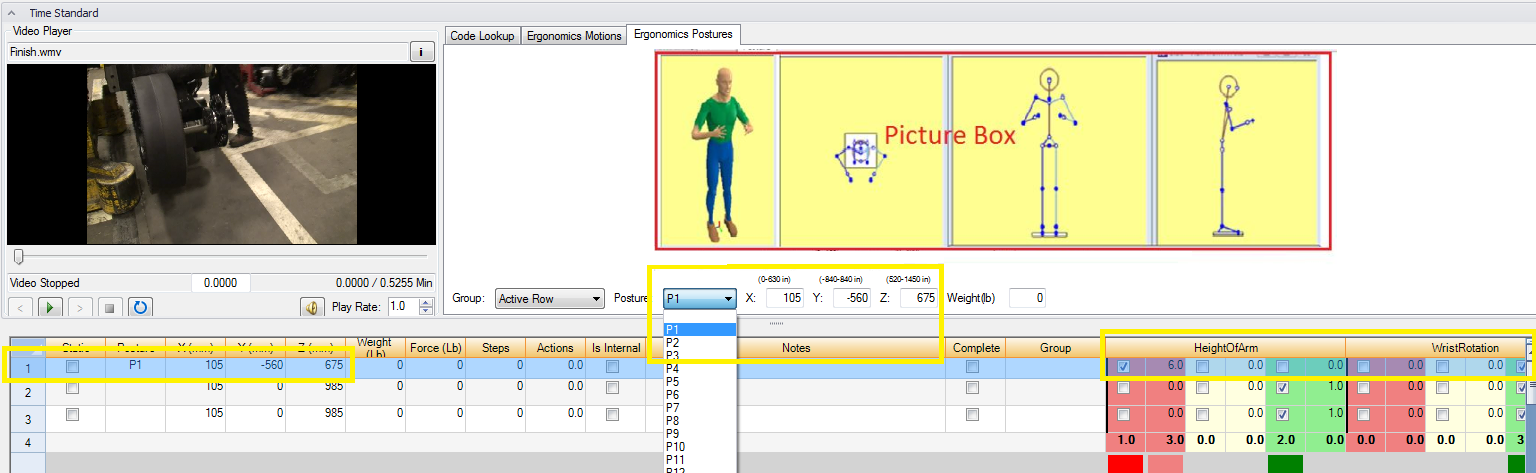
If manually changing the values for X, Y and Z, the maximum range for postures are showing above the X, Y and Z boxes
Ergonomics Postures Step by Step Walk-Through
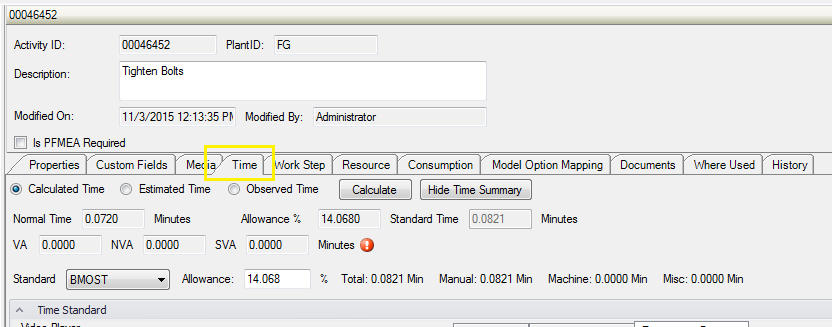
1.Open an activity (see Activity Editor)
2.Select the Time Tab for the activity
3.Create three tasks in Observed Time (see Time)
4.Select the Ergonomics Postures Tab in the Time Standard
5.Select the first task and select Posture P1 from the Posture Dropdown Menu. Observe how the X, Y, and Z columns for the first task update to match the X, Y, and Z values for P1. The ergonomics values on the right also update for P1
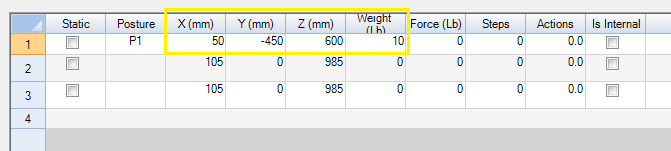
6.Edit the X, Y, Z, and Weight fields in the postures section and select the save icon ![]() . Observe how the X, Y, Z and Weight columns in the tasks table have updated to match the manually entered values.
. Observe how the X, Y, Z and Weight columns in the tasks table have updated to match the manually entered values.
7.
8.Edit the X, Y, Z, and Weigh fields in the directly in the tasks table. Observe how the X, Y, Z and Weight columns have updated in the postures section to match the manually entered values.
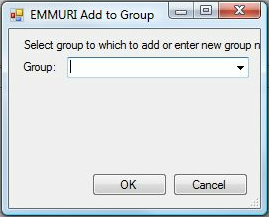
9.Go to the 'Group' Column and create groups for the 3 tasks

10.Select a group in the Group Dropdown Menu, then change the Posture to P2 and select the save icon ![]() . Observe how all the tasks in this group have changed to P2
. Observe how all the tasks in this group have changed to P2
