You must have a scenario set up to perform an Automatic Line Balance. See the Creating a Line Balance Scenario tutorial if you need to set up a scenario. If the scenario already exists, go to the line balancing module, then go to File and select Open Scenario. Choose your scenario and click "Open".
Performing a Balance
If you have a scenario with a single-sided line, one operator per station, and no monumental resources, skip to step four. Otherwise, follow the steps that pertain to your scenario.
1.Typically, multi-sided lines are chosen because the activities have some sort of zone restriction. A multi-sided balance allows you to set up set up zones for stations where needed. Station zones are set up within the scenario and are stored only in this scenario.*
Remember that adding one or multiple zones to stations is a constraint; you are restricting what type of work can be assigned there. This is often necessary, but keep in mind that the tighter the scenario is constrained, the lower the resulting operator utilization is likely to be.
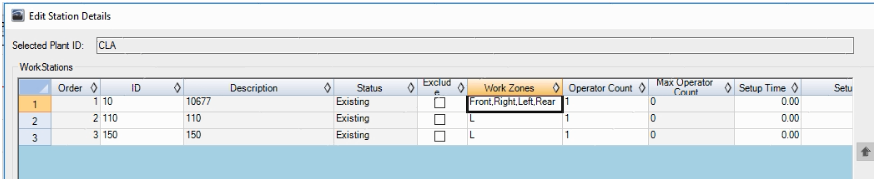
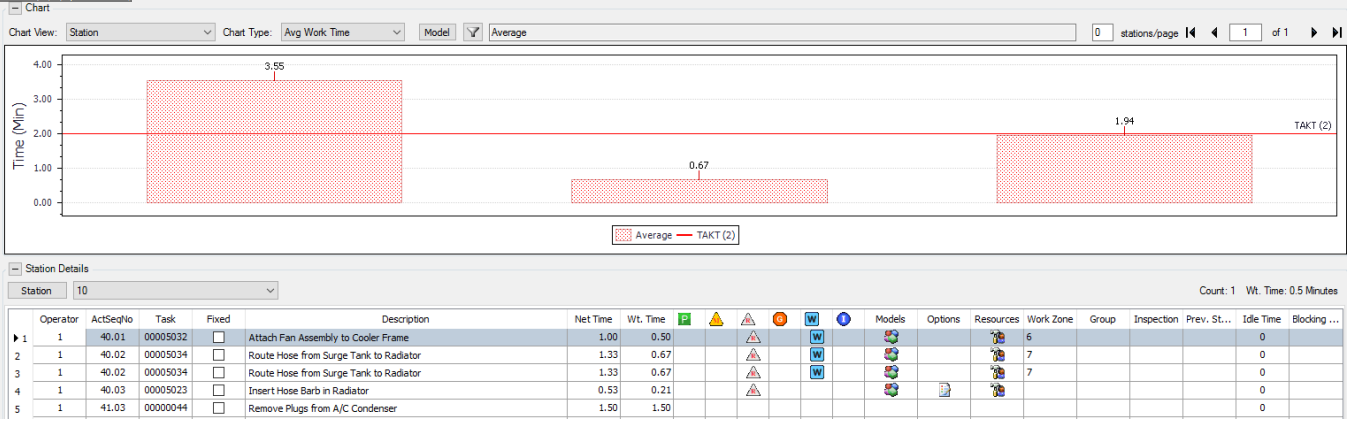
Go to Edit and select Station Details. Enter the appropriate work zones in the Work Zones column. Stations may have multiple work zones; separate the zones by a comma. "Left", "left", "L" and "LEFT" will be recognized as four different zones, so make sure you are consistent. The work zone names must match the work zone names given to the activities; Assembly Planner will match the text exactly.
If you do not see the Work Zones column, you have created a single sided line.
*This is in contrast with the way zones are assigned to activities; zones for activities are set up and stored in the Library. Zones for stations, however, do not exist outside of the scenario.
2.Designate stations as Multiple-Operator. If you want multiple operators at one station, the operator count is also specified in Edit > Station Details. Simply change the number in the Operator Count column to reflect the number of operators at that station. If you do have a station that has multiple operators, you should strongly consider using work zone constraints as well. Multiple operators and work zones goes well together, because it helps prevent operators being assigned work that causes them to trip over each other. Operators can also be 'Shared' between stations, causing a single operator to be responsible for tasks in multiple stations. This sheet can also be used to identify setup times and descriptions for each station.

3.Specify any Monumental Resources. [Please remember that the Monumental Resource constraint will only be helpful if the monument is assigned to a station (Library > Plants Editor > Resource column) and certain activities have this resource assigned as necessary (Library > Operation Editor > Activity List > Resource column).]
Monumental resources are given their 'monumental' designation within the line balance scenario, and it will not apply outside of the line balance scenario.
To set a resource as monumental:
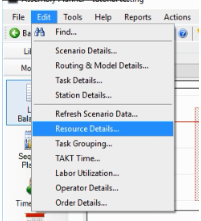
a.Go to "Edit" > "Resource Details".
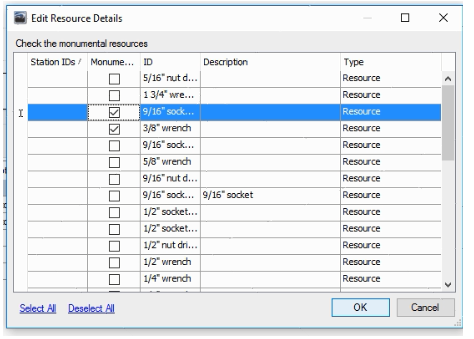
b. The Edit Monumental Resources window will come up. Check the box next to a monumental resource.
c. When you get to Step 4, make sure you check the 'Consider Monumental Resources' box
4.To balance the line using your scenario, go to Actions > Default Balance or click the Default Balance ![]() button.
button.
| a. | Select a Balance Type. You may choose to Minimize Number of Stations, which will find the least number of stations necessary given the Takt time you provide. Otherwise, you can choose to Minimize Cycle Time, which will calculate the lowest cycle time possible with the number of stations you have specified. |
| b. | Select the algorithm. This portion of step 4 applies only to MIXED MODEL BALANCES–a single model balance only has one option. Refer to the Line Balancing Algorithms section of the manual for an explanation of the different algorithms. |
| c. | Based on your selection in 4a, you will be required to enter either the desired cycle time (Takt) or the number of stations available. |
| d. | Make sure you check the box next to "Consider Monumental Resources" if you want the monumental resources designated in step three to be considered. |
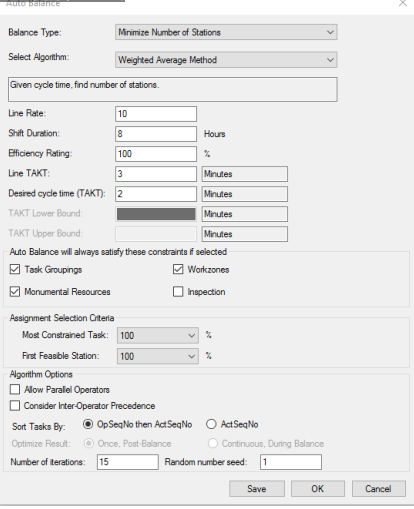
| e. | Click "OK". Your line balance results will appear. |
5.You can generate reports by going to Reports > Report Manager. For more information on all Assembly Planner Reports, see Reports. Select the report you want and then select the stations if necessary. Clicking "Generate" creates the reports. The reports can be printed or saved as an HTML file.
6.Modifications can be made to this scenario using the tools in the Edit menu.