The Calculated Time tab allows you to perform a time study based on a predetermined time system.
To perform a calculated time study, open an existing study by going to File>Open, or create a new one.
1.Open the application and go to File>New.
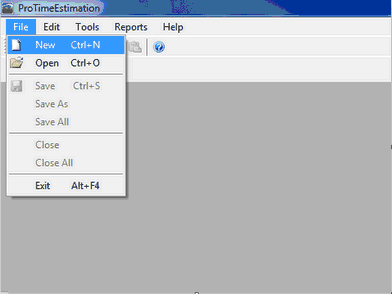
Creating New Study
2.Enter the study properties. A Study ID is required; the other fields are optional.
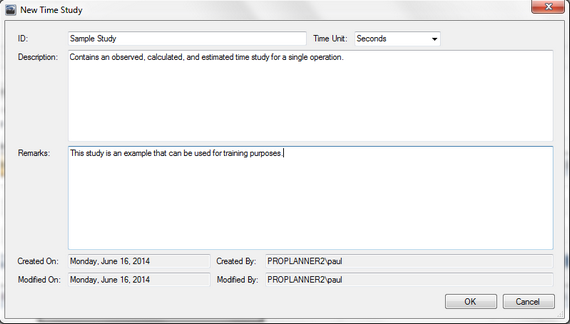
Study Details
3.You can begin by entering your list of tasks in the Tasks tab, or go to the Calculated Time tab immediately. Note that if you are working with an existing study, your task list will already be populated.
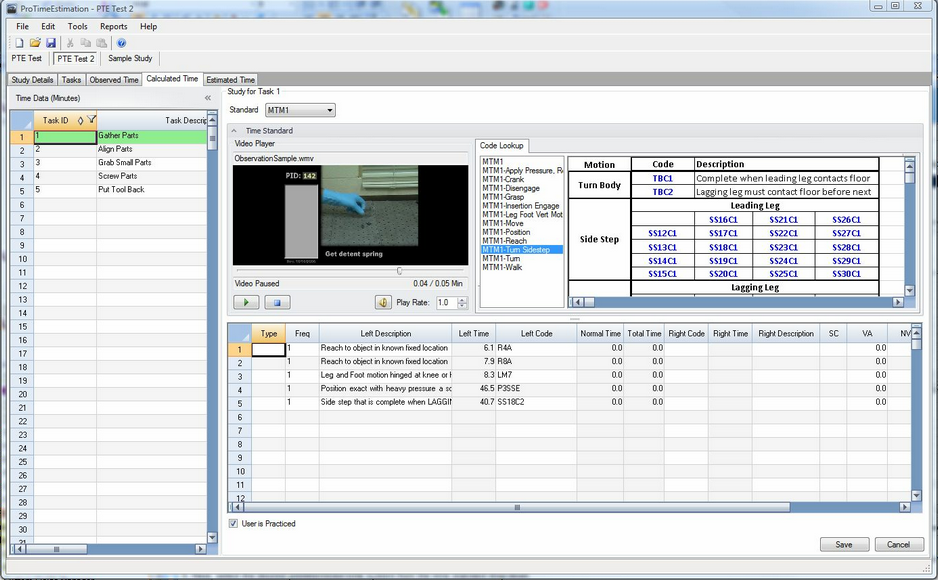
Calculated Time Tab
4.Enter your list of tasks in the Time Data table on the left by entering an ID for each, or a task description. Note: If you add a task description without a task ID, an ID will be automatically populated for you.
5.Next, select the desired predetermined time system from the time standard drop-down.
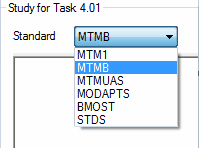
Time Standard Dropdown
6.Once the standard is selected, the editor format at the bottom will change. For example, MTM-B is a text-based system whereas MODAPTS is a code-based system, so their respective editors look different.
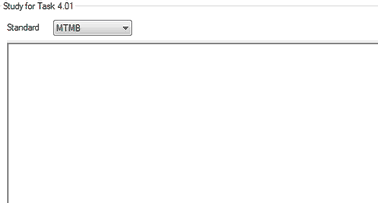
MTM-B Display Format
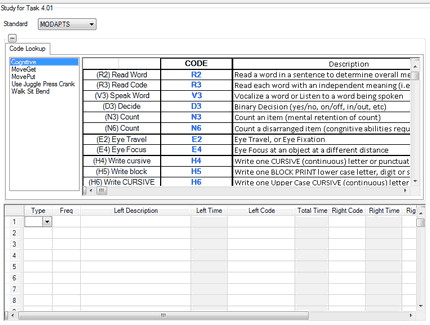
MODAPTS Display Format
7.The next step is to select the task for which you want to perform your calculated time study. You can choose to perform a calculated study on some or all of the tasks in your task list. Simply select the row of the task in the Time Data table.
8.If you have selected MTM-B, you can simply type in the element text to perform your study. If you have chosen a code-based system, you can use the lookup sheet that appears. Simply double-click on the bold blue text codes you would like to use. The information related to the chosen element code will be added to the spreadsheet below, which is the time list for the task. You can also type the code in the table under a column which includes the word "Code" or "Element" in the header. (The column headers are labeled differently for each time standard.)
9.Once all elements have been defined, you can fill in details about the element frequency, operator instructions and value/non value added time. You can expand the Time Data control on the left to view the roll-up of element times for the task (displayed as the Normal Time) and to set allowances for each task as a whole.
10. Some time systems allow specification of internal elements. These are elements that occur at the same time, and therefore, both times should not contribute to the total time. If the internal column ("Int") is provided, it displays the row number of the element to which the task is internal. The time for the element in the internal column is compared to time of the current element and the element with the higher time determines the effective time.
In the example shown below, Element 1 is 150 Time Measurement Units (TMU) and Element 2 is 40 TMU. Element 2 is defined as being internal to Element 1. By setting Element 2 as internal, net time of the two elements is calculated at 150 TMU.
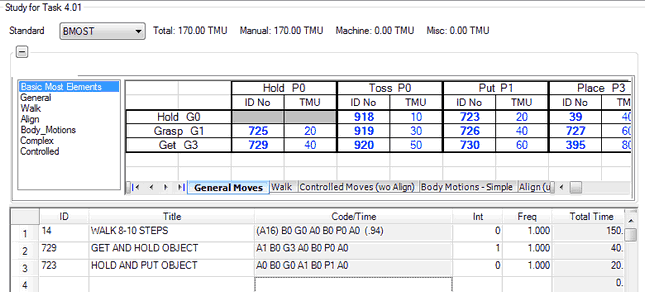
BMOST Display
11. When you are finished with the study for one task, return to the Time Data table on the left and select your next task to perform a calculated study.
For more detailed instruction in any of the time systems, please contact the publishing organization for the standard. Their documentation will give you a better idea of the specific formatting provided for that method.