To map models or options to activities in the Routing Editor, both the routing and its operations need to be checked out. After checking out the routing and operations, right-click on the routing and select "Edit Model-Option Data" from the menu. The Edit Model-Option Data window, as shown below, will appear.
Models
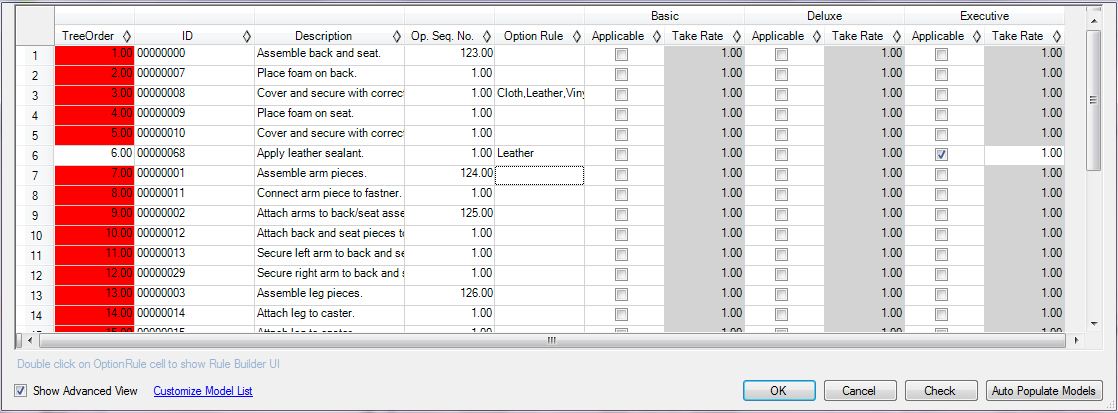
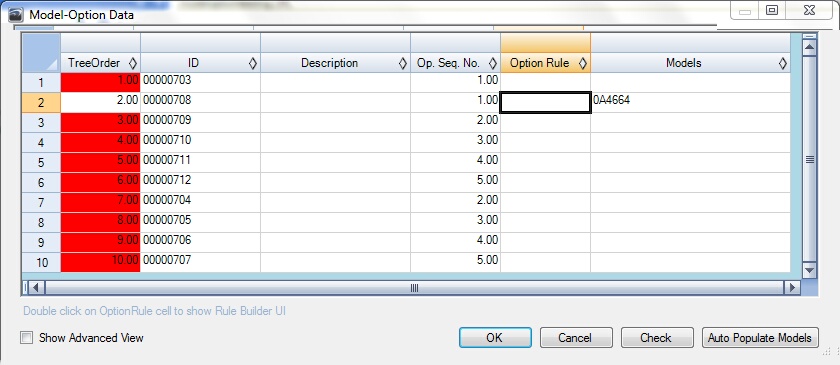
In the Edit Model-Option Data window, each activity has its own row. The models can appear two different ways. If the 'Show Advanced View' box at the bottom of the window is checked, each model appears as a column header with an 'Applicable' checkbox beneath. The models displayed can be changed with the Customize Model List option. In the regular view, there is one column named "Models."
Advanced View
In the advanced view, checking a box means the activity applies to the model, or is performed when producing that model. If you check a box for one model, make sure you check the box for all models to which that activity. applies.

Edit Model-Option Data window Advanced View
Standard View
In the standard view, you can manually type the Models, to which the activity applies, in a comma-separated list. All models not included in this list will not have this activity associated with them. To verify you have entered the Model IDs correctly, you can click the "Check" button and it will highlight in red any models that do not exist in the Model Editor.

Edit Model-Option Data window Standard View
Options
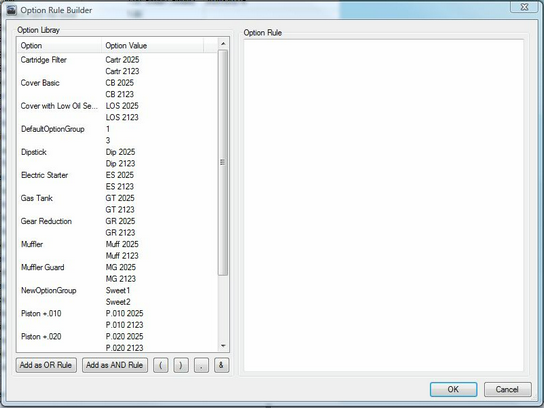
Option Mapping also can be completed in the Routing Editor. Typically, this is done after the models have been mapped to activities (with the exception being if you plan to use the 'Auto Populate Models' (see below)). To map options to activities, you will need to make sure you have checked out the routing and its operations. Right-click and select "Edit Model-Option Data" from the menu to make the Edit Model-Option Data window appear again. Note: There is a column called Option Rule. Double clicking on one of the option rule cells will open the Option Rule Builder for the selected activity.

Option Rule Builder
To add an option rule to the activity, select the desired options and click "Add as OR Rule" or "Add as AND Rule". The "Add as OR Rule" is used if you have multiple options that do not necessarily have to be together in assembly. Make sure to highlight the options that will go with the Add as OR Rule and then select the button. Those options should appear under the Option Rule box. You can use "Add as AND Rule" to add options that must be added with the other options. Make sure to highlight the options that will go with the Add as AND Rule and then select the button. Those options should appear under the Option Rule box. Rules can be created manually if desired. Parentheses, commas, and ampersands (&) can be used to create a rule. For an OR rule, separate the options by the comma (1,2,3). The AND rule needs to use the ampersand (&) to separate the options (1&2&3).
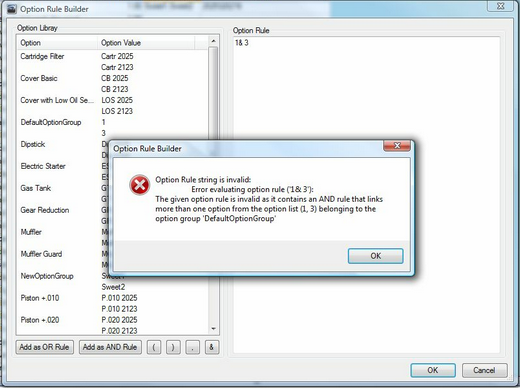
Once the rule has been created, hit the OK button. If there is something wrong with your Option Rule, an error will pop up and give you directions to correct the rule. The error was thrown because you cannot have an AND Rule with multiple options from the same Option Group.

Option Rule Error
Auto Populate Models button
In some cases, it is easier to map options to activities and then have Assembly Planner map all models to which those options belong. If this is the case for you, after you have mapped your options as described above, make sure you have also added those options to the Option Rules list for all models to which they can be included. After doing this, you can click the Auto Populate Models button. For each activity, it will look at the options mapped, and add all models to which the options belong.