After setting up the plant and the users, it is time to import templates. The templates include the data look up sheets used in calculated time studies, work instruction templates, and a variety of reports; this step may not be required, as it may have been previously performed during system implementation.
The templates need to be loaded so that Assembly Planner has access to the information it needs; load the templates once, and you will not need to repeat the process unless there has been an update to a template.
1.In the Admin Tools menu, click on the Template Manager icon ![]() . In the template manager editor, you can see which templates have been loaded. The first time you look at the template manager, it will be empty because the templates have not yet been loaded.
. In the template manager editor, you can see which templates have been loaded. The first time you look at the template manager, it will be empty because the templates have not yet been loaded.
2.Click on the Import button ![]() OR right-click on the empty worksheet space and select import from the drop-down menu.
OR right-click on the empty worksheet space and select import from the drop-down menu.

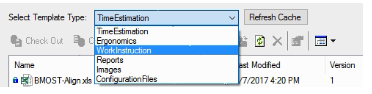
3.Make sure to select the appropriate template in the Select Template Type drop-down menu (TimeEstimation for the example below).
4.Find the Templates folder (this folder was provided by Proplanner with the Assembly Planner software). You will see five sub-folders. The contents of Time Estimation, Work Instructions, Ergonomics Templates, and XSLT reports all need to be uploaded. The Image folder contents should be uploaded if they contain images that need to be accessed by all users (e.g, company logo or plant-wide personal protective equipment photos).
In the templates folder, select the file or files to upload.*

5. When the templates have been successfully imported, they will appear in the template manager editor as shown below.
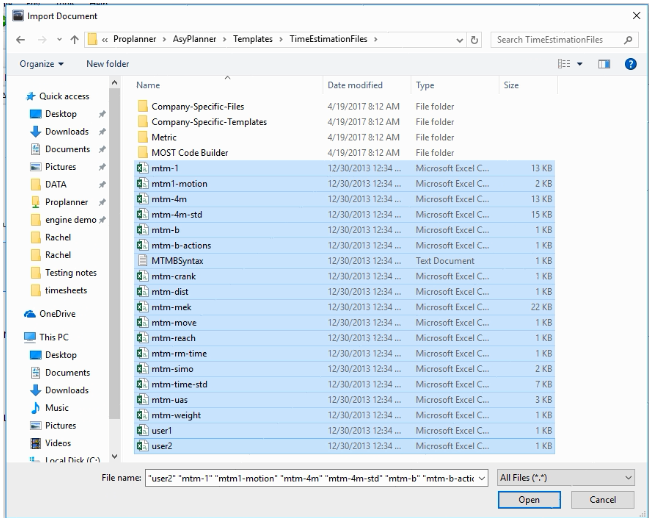
To select all templates in the folder, click the first file in the list, hold the shift key, and then click the last file in the list.
6. Press "Refresh Cache"
7. Next, change the "Template Type" via the drop-down menu.
8. Repeat the process: select Import, find and select the appropriate files, then click "Open." Continue until all templates from each type are imported.
The use of the rest of the buttons on the toolbar is discussed in the Documents section.
The next step is to create custom fields for the plant.