Up to this point, the time study you created has been saved as a standalone file - it has not affected your data in the Assembly Planner database. Once you have completed your study, you can apply the standard times to activities in your database with this menu option, following the steps below.
1.Go to Actions>Apply Time Study.
2.On the first screen, you will choose settings for Data to Apply and Time Study Task to Activity Relationship.
Data to Apply:
Choose what type(s) of data from your time study you would like to apply to activities in the library. Pay attention to the Notes in red to help understand the impact of your selection(s).
Also note that even if you do not check the 'Activity Videos' box, the video clip(s) you captured for the observations of each activity will be applied to the activity in the library. If you do check the 'Activity Videos' box, the video that is selected in the Video column in your study will be set as the Process Video for the activity. The Process Video is the video that will be played when looking at the activity in the Yamazumi chart, and may also be the video used in electronic video-based work instructions.
Time Study Task to Activity Relationship:
If you wish to apply each task in your study as an activity in the library, select the 'Single' option.
If you wish to combine multiple tasks in your study to become one activity in the library, select the 'Group' option.
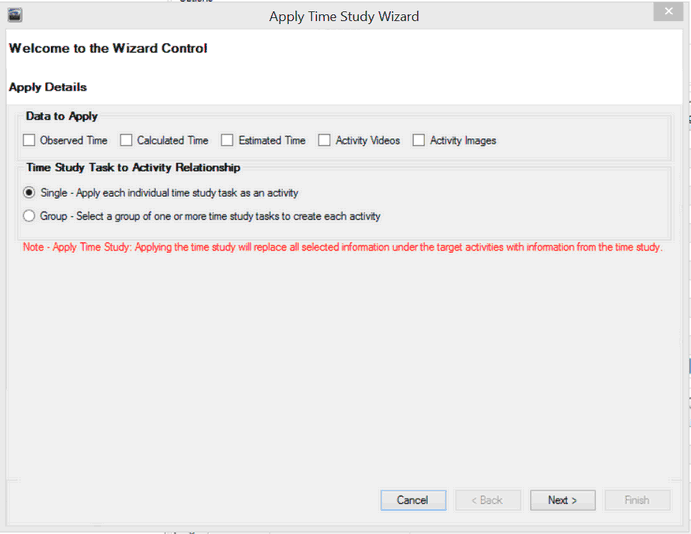
Apploy Time Study Wizard Control
3.On the second screen, you will choose the activities whose time data you wish to apply. Use the Select All and/or Deselect All buttons to make the selection process easier.
The 'Exists in DB' column indicates whether the Study Task ID matches an activity ID already in the library.
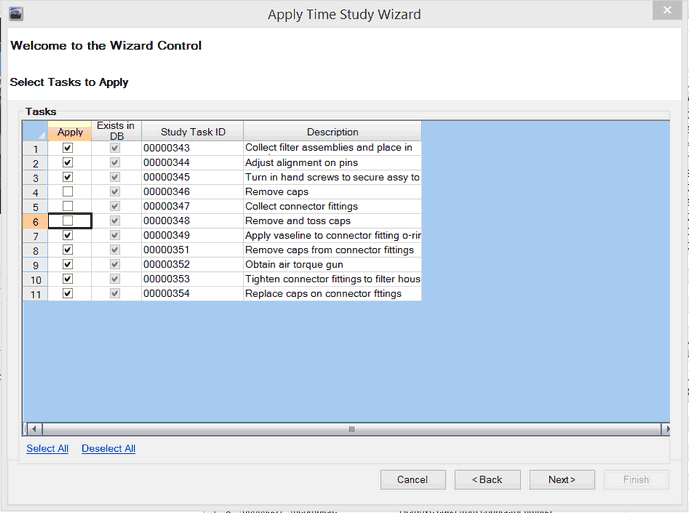
Time Study Wizard Page 2
4.On the third screen, you will choose the activities for which you wish to generate new IDs. Use the Select All and/or Deselect All buttons to make the selection process easier. If you generate new IDs, this will create a new activity for each task you have selected to apply. If you wish to update the time data of existing activities, do not regenerate new IDs.
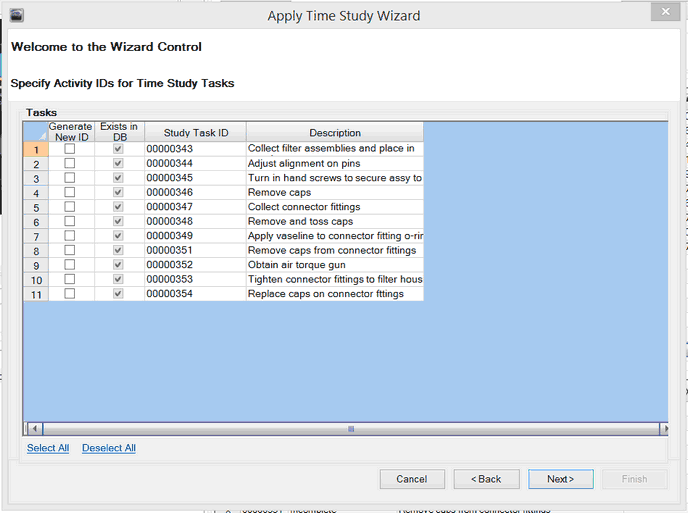
Time Study Wizard Page 3
5.On the fourth screen, you will indicate whether to apply the selected activities to an operation or not. If the activities in your study already exist in an operation, leave the first selection set to 'No' and click 'Next.' If any activities in your study are new, you will likely want to apply them to an operation. If so, select 'Yes.' Then, choose from the 'Merge' and "Replace' options. Please refer to the Notes in red to decide which setting to use.
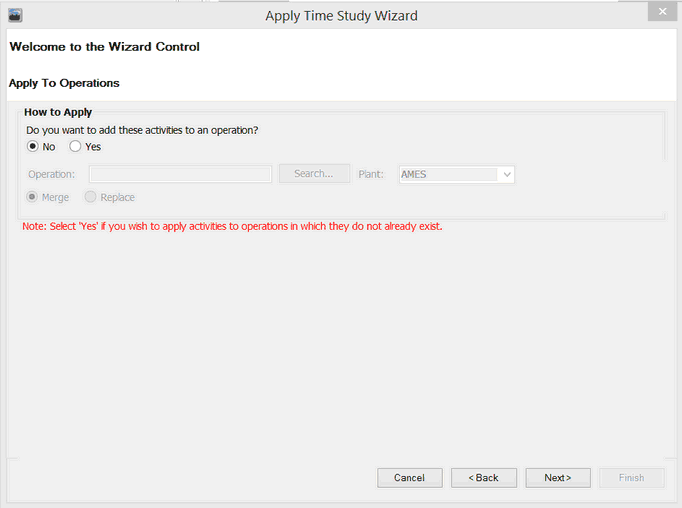
Time Study Wizard Page 4
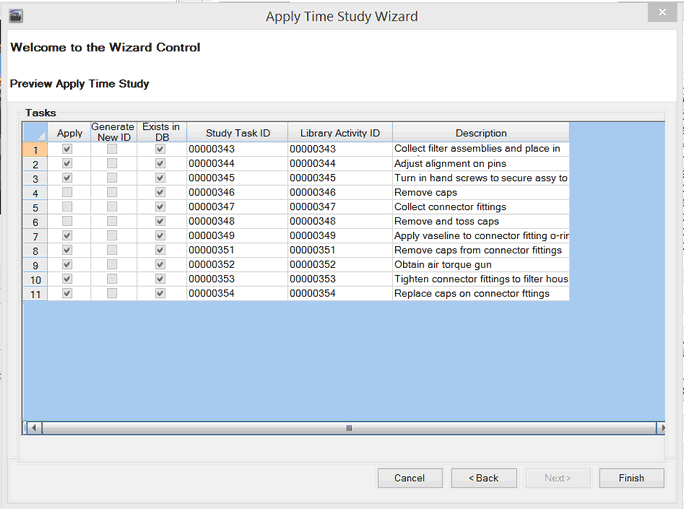
6.On the fifth screen, you will review the selections you made and finish the Apply process.
Time Study Wizard Page 5
Here is an example of the specific steps you would take if you are applying an observed time study, and the task IDs in your study match the activities in the operation you've been studying (or in other words, you imported the activities into the study).
1.Go to Actions>Apply Time Study.
2.On the first screen, check 'Observed Time' under Data to Apply and leave 'Single' selected. Then click 'Next.'
3.On the second screen, check the boxes next to the activities whose new observed time data you wish to apply. Click the 'Select All' button at the bottom if you wish to apply the time data for all activities in the study. Then click 'Next.'
4.Ignore the next screen and click 'Next.' You do not want to generate new IDs since you want to apply the new time data to the existing activities.
5.On the next screen, leave the How to Apply setting to 'No.' The activities you've selected already exist in an operation, so you do not need to apply them to the operation. Click 'Next.'
6.Review the Preview of activities to be applied.
7.Click 'Finish.'