How to Set Up Work Zones
1.Important note before starting: you can name work zones however be consistent in naming them. If you use 'Swab' and 'S' they will be considered to be two different work zones. However naming work zones is not case sensitive. Swab, swab, and SWAB would all be considered to be one work zone.
2.If an activity must be performed in a particular work zone, define the work zone in the Work Zone cell of that activity in the Operation Editor's Activity List. If a task requires multiple work zones, separate them with a plus sign (e.g. Swab+Cushion). If a task can be performed in one work zone or the other (but doesn't require both), separate them with a comma (Swab, Cushion.)
a.Click on the Routing Editor.
b.Click on the Quick Find button to see all Routings.

c.Open the folder of the routing you wish to view.
d.With the Routing Editor open, find the desired Operation in the Operation List spreadsheet.
e.Double click on the row header of the desired Operation.
f.Right Click on the Operation and select "Check Out All"
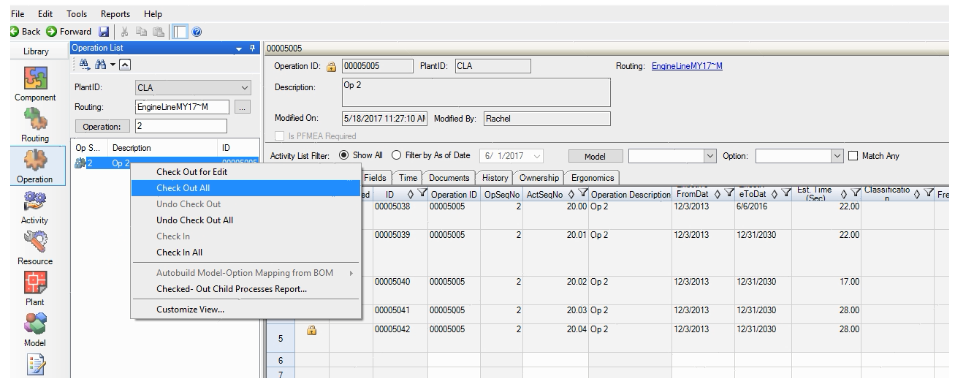
g.Find the Work Zone field in the Activity List Spreadsheet.
h.Use the drop-down to select a work zone, or type in the work zone.
i.Continue until all necessary Work Zones have been applied to the appropriate activities in that operation.
j.Not all activities should have work zones - only those that must be performed on a particular part of the unit should have work zones.

k.When you're finished, remember to right click on the operation and Check In All.
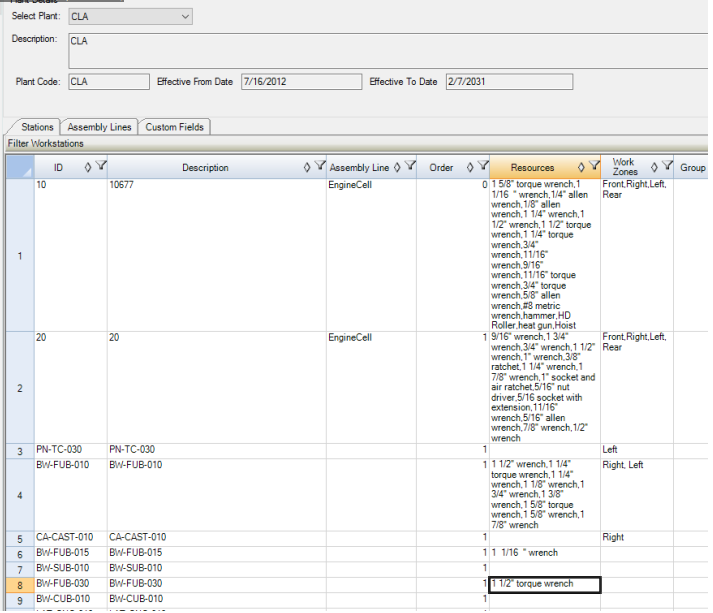
3. Define the work zone(s) for each station in the Work Zones column in the Plant Editor. If the station consists of multiple work zones, separate them with a comma (Right, Front, Left, Rear.)
a.Click on the Plant Editor
b.Find the appropriate Workstation ID row.
c.In the Work Zone Column, type in the Work Zone. If there are multiple Work Zone in a station, use a comma separated list.
4. When you create your scenario in Line Balancing, set the Line Type on the first page of the wizard to "Multi-sided." If you're using an existing scenario, you can change the setting from "Single-sided" to "Multi-sided" by going to "Edit" > "Scenario Details"
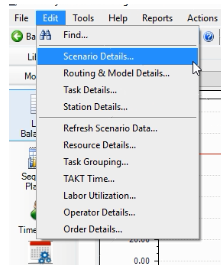
5. If you want to add work zones to a station only in the scenario, go to "Edit" > "Station Details." Find the appropriate Workstation ID Row and in the Work Zone column, type in the Work Zone(s.)