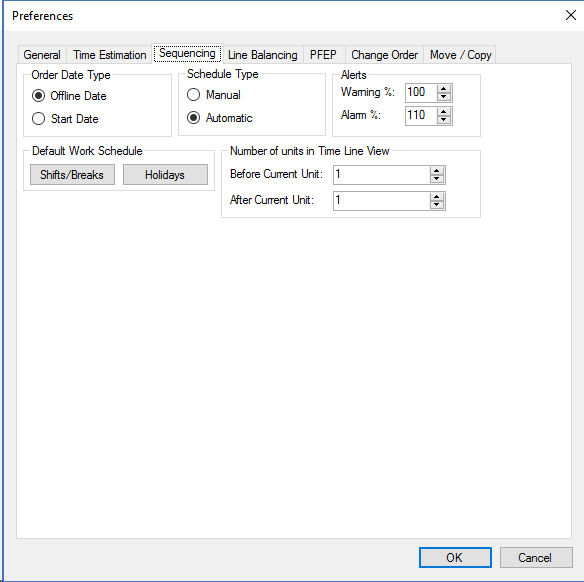
This set of preferences is used to set the defaults in the Sequence Planner module.

Preferences- Sequencing Tab
Order Date Type
This allows you to specify whether the order dates provided are when the orders either need to be finished (the Offline Date) or need to begin production (the Start Date).
Schedule Type
The schedule type allows you to specify how Sequence Planner will handle orders.
If the schedule type is Automatic, the orders will be assigned to the order date specified in the Order File. The length of the work day in the Automatic schedule type is determined by that day's order quantity.
If the schedule type is Manual, you will need to set up the start time, end time, and break times for the day; orders will be fit into the day. An order will not necessarily be processed on its order date; it may be pulled ahead or pushed back as needed to fill each work day.
Alerts
This feature allows you to quickly notice if a unit is over a specified percentage of Takt time. Based on the user-specified values, Sequence Planner colors cells in the sheet view of the main window. The warning flags are yellow, and the alarm flags are red.
Number of units in Time Line View
This refers to the chart section of the main window. You are allowed to change the default number of units appearing before and after the current unit. If you want to always see two units before and three units after the current unit, changing the setting here will tell Sequence Planner to display two units before and three units after the current unit every time Sequence Planner is started. If you change this setting, you will need to restart the application for the change to take effect. Note: You can always make changes to the number of units viewed in the main window of Sequence Planner. Changes made in the main window do not affect the default and will need to be reset every time you return to the module.
Default Work Schedule
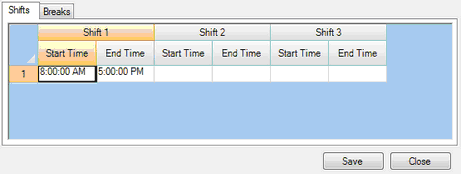
This menu allows you to define the work schedule. A checked box in Weekly Off Days corresponds to a day of the week that is not worked. Clicking on Shifts/Breaks opens a new window where scheduled downtime can be input. The start and end times are entered under the selected tab to edit shifts and breaks.

Shifts/Breaks window for input of scheduled downtime
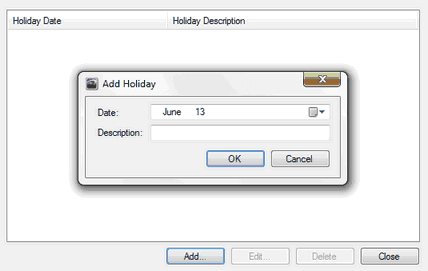
Clicking on the Holidays tab opens a new window that allows the addition of holidays. Once in the new window, clicking the Add button opens a new window where a date can be selected, and a description can be added if necessary. Edit and Delete functions can also be used on existing holidays.

Holidays window for input of scheduled holidays
Closing the Holidays window saves any changes. Clicking OK saves all changes made within the tab. If any changes made only take effect after restarting the application, a window will notify you.