Defining precedence is ordering the tasks (activities) according to the required sequence.
You will need to create some sort of precedence graph if you intend to use the automatic line balance tool.
In the graph view, the precedence can be modified by deleting arcs between tasks and redrawing them to set the correct precedence. To delete an arc, click on it and press the delete key. To draw a new arc, move the mouse to the middle of the node. The cursor will be a hand sign; click and release at the desired node.
In the sheet view, enter the row number of the task(s) that must come directly before the current row.
Please note that the row numbers are used, and not the activity ID. Also, the entries in the predecessor column are dynamic and automatically update. If new activities are inserted into the middle of the sheet and the row numbers change, they automatically change in the predecessor column as well.
If an activity has multiple direct predecessors (meaning the order in which the predecessors are completed does not matter as long as all are completed before the given activity), create a comma-separated list in the Predecessors column. If an activity has no predecessors, the cell in the Predecessors column should remain blank.
1.To create a precedence graph, go to the Library and click on the Routing Editor ![]() button.
button.
2.Search for and select the correct routing. Right-click on the routing name and click Check Out for Edit.
3.Go to the Precedence tab. Notice the two tabs, Sheet View and Graph View, at the bottom of Precedence tab. Select the Graph View.
![]()
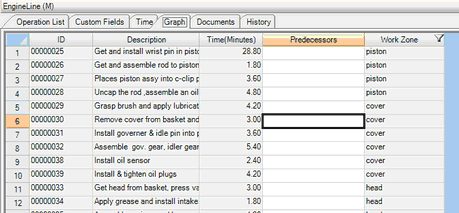
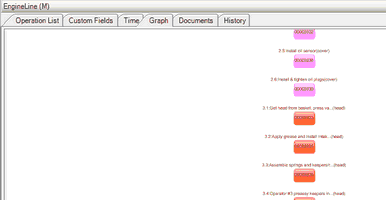
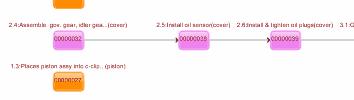
4.Since no precedence has been set, the Predecessors column in the sheet view is blank, and the graph view shows disconnected nodes. Note that the color of the nodes corresponds to the Work Zone, and may not be set. The default for no work zone is grey.
5.To put all of the activities in sequential order by Activity ID, click on the Default Precedence ![]() button in the precedence toolbar. This step is not necessary, but is sometimes helpful.
button in the precedence toolbar. This step is not necessary, but is sometimes helpful.
6.The precedence toolbar contains Zoom tools, Edit Mode (which you must be in to create precedence manually), Pan Mode, Auto Layout, Default Precedence, and a cycles button.
![]()
7.We can create the precedence structure either in the sheet view or the graph view. Remember that the point of precedence is to specify which tasks must happen before another one can possibly occur. Making changes in either view automatically makes the same changes the other view.
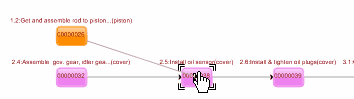
| a. | To create or edit precedence in the graph view, draw an arc from one activity to the next by moving the cursor to the middle of the predecessor node, clicking and holding down the left mouse button, and releasing when you reach the middle of the following node. To remove an arc, click on the arc to select it and then use the keyboard Delete key. |
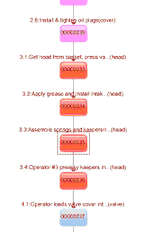
When you click Save or the Auto Layout ![]() button, the nodes will be rearranged to display the newly set precedence relationships.
button, the nodes will be rearranged to display the newly set precedence relationships.
If you are zooming in or out or panning the view while you are trying to draw arcs, check the buttons at the top to make sure you are in Edit Mode.
connect nodes
click save or auto layout
| b. | To create or edit precedence in the sheet view, enter the row number of a task's predecessor in the Predecessors column. If a task has multiple predecessors, enter all row numbers and separate them by a comma. |
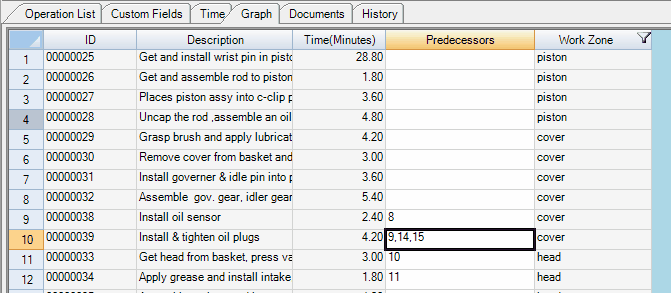
Note that the worksheet's ROW NUMBERS are used here. It is not the activity ID of the predecessor, but the number of the row that the predecessor appears in.
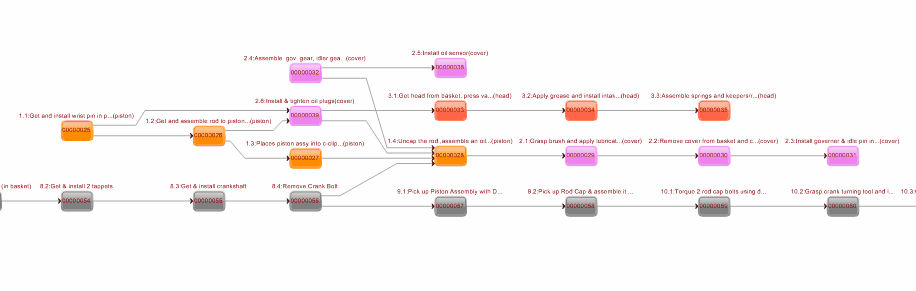
8.When you are finished, you will be able to see how the whole process fits together. It may be helpful to read through the graph view and make sure that all activities that should be connected are, and activities that do not need to be connected are not. Real processes almost always appear to be more complicated than the example shown here.
The next step is to import resources.