Every Custom Field can have a drop-down list associated with it. A list restricts possible entries in the custom field to those in the list. If there is no list associated with it, the field is open for users to enter information as they see fit; this method works for many custom fields. However, if it is important to control what is entered, a list needs to be associated with the custom field.
For example, it may be important to have a list if information for an MRP system will be extracted from Assembly Planner. This would restrict users to enter only information that is correct and usable by the MRP system. However, a list would typically not be appropriate for something like the description of activities on an assembly line. In this case, it would be important to give users the freedom to enter information without a list.
1.In the Data Mgmt menu, click on the List Management button ![]() .
.
2.Click the Add button.

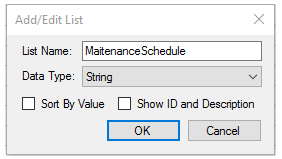
3.The Add/Edit List window will pop up. Enter the list name. Make sure that the data type selected for the list matches the data type of the custom field the list will be used with. The check boxes may be used to control the layout and depth of information of the list. The show ID and Description will display the entire description in the drop-down in custom fields.

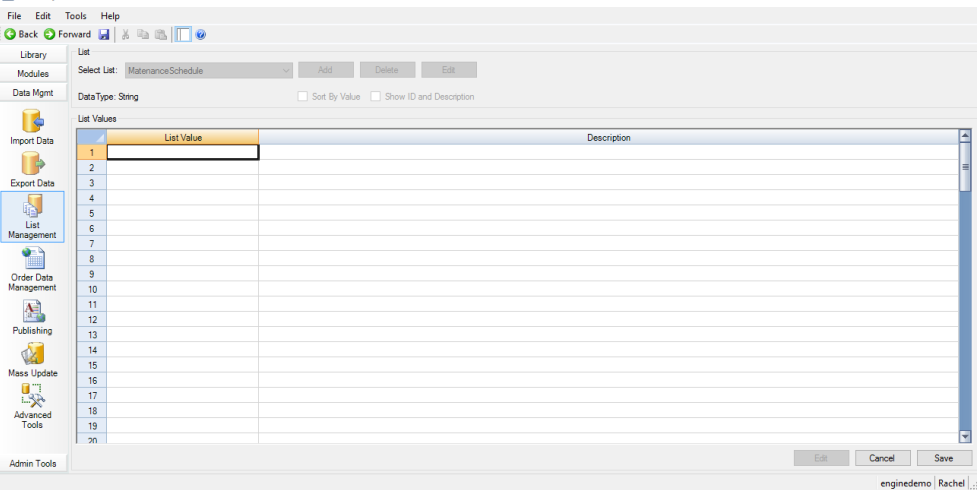
4.When the new list has been created, select the list from the drop-down menu. Click the edit button at the bottom of the spreadsheet.

5.Make your entries. You may include a description, which is especially helpful if the list entries are abbreviations or include a numbering system.

6.When you have completed your list, click Save. The list will now be available to associate with any custom field; an administrator can assign the list to a custom field by editing the custom field in Admin Tools. See Associate Lists with Custom Fields for step-by-step instructions on associating the list to the custom field.